Cart (0)
- No results. Please try again.
In order to best utilize ReFelt PET Felt panels, it is recommended to review the different ways of processing and mounting. These instructions provide you with all the necessary guidelines. You can download the manuals in a handy printable format or follow the video instructions. Please, note that any methods or techniques not listed on this page are not ruled out.
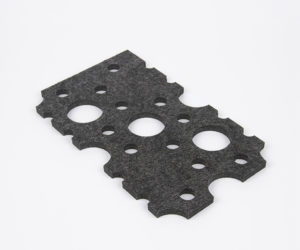
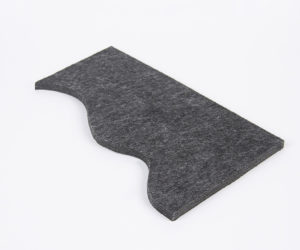
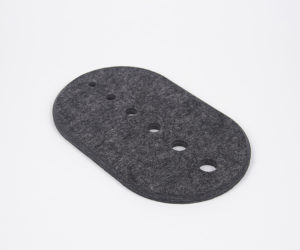 Computer-controlled cutting enables you to cut highly detailed shapes and patterns. There is no material loss and different components can seamlessly connect. This technique also provides the option to cut at different angles, as required for v-grooved or bevelled edges. The diversity of options this technique has to offer provides you with endless possibilities for design and form.
Download Processing manual (ENG)
Download Verwerking handleiding (NL)
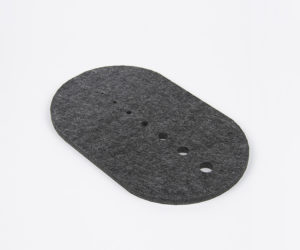 Waterjet cutting is a precise processing method that enables the smallest of details to be cut. Similar to the digital cutting process the cutting path can be applied almost invisibly. Highly detailed, seamless cutouts can be created. Only pure waterjet cutting is suitable for cutting Pet Felt panels. This is a type of waterjet cutting without the addition of abrasive particles.
Download Processing manual (ENG)
Download Verwerking handleiding (NL)
 Laser cutting is precise, but it has the disadvantage of using heat for the cutting process. Due to the thermoplastic properties of the material, if using a hot laser beam, it can burn, harden and discolour the edges of the PET Felt Panel. For this reason, we do not recommend this method. However, it could be suitable to use for projects where the PET Felt panel is framed.
Download Processing manual (ENG)
Download Verwerking handleiding (NL)
 Die-cutting is suitable for high volume production of equal sectioned panels. It is an accurate and fast production method that requires a cutting mould. These moulds need to be custom made. Production costs are therefore high for low volume production.
Download Processing manual (ENG)
Download Verwerking handleiding (NL)
When cutting the PET Felt manually we recommend using a sharp knife combined with a ruler for the best possible result. A utility knife or precision knife will be sufficient.
Download Processing manual (ENG)
Download Verwerking handleiding (NL)
Track saws (plunge cut), table saws (pull-push saw), mitre saws are generally suitable for use with PET felt panels and often a quick way to create custom-sized PET Felt as needed. It is recommended to test the required speed of the saw with a piece of the material since some saws can be set to a different speed and blade. Our advice is to experiment with the material in order to find the right machine settings for the preferable result. Note: circular saws can also be used to create chamfered edges.
Download Processing manual (ENG)
Download Verwerking handleiding (NL)
 Jigsaws are ideal for decorative and freeform curves, shapes and cutouts. It is less likely a tool to use when precise shapes and dimensions are required. With this method, you are less flexible because the material can only be sawn closely to a stable surface. When using a jigsaw, the material should be treated as a thin wood panel material, as this is equivalent in flexibility.
Download Processing manual (ENG)
Download Verwerking handleiding (NL)
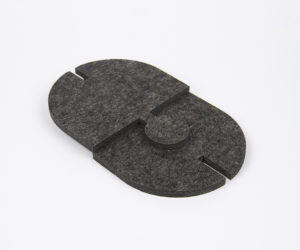 By making recesses in the material of 9 mm (which is the sheet thickness), two shapes can be connected. This connection is ideal for making 3D acoustic sculptures. Interlocking 2D shapes or tessellating patterns can be used decoratively and for simplifying the positioning and installation of a tile pattern.
Download Processing manual (ENG)
Download Verwerking handleiding (NL)
 The digital cutting process enables V-grooves. A V-groove creates a hinge in the material which allows it to be folded seamlessly into an angle or shape. Unlike kerf cutting, this method will result in angular-shaped lines instead of smooth curving lines. There is a maximum cutting depth in order to maintain the strength of the material and the hinge. For example, PET-felts can be folded seamlessly at v-grooves of 45° with cutting depths of 7mm.
Download Processing manual (ENG)
Download Verwerking handleiding (NL)
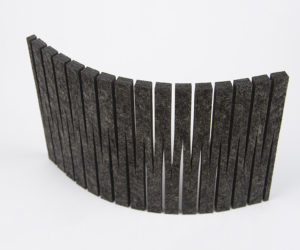
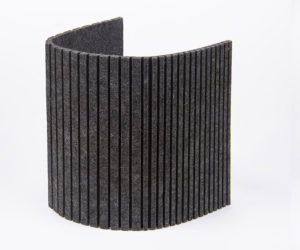 Kerf cutting the PET Felt makes it possible to form the material into a curve. A kerf is a narrow channel that is left behind by the saw blade. The width combined with the depth and spacing of the kerfs determines the flexibility of the panel. Keeping the kerfs close together and regularly spaced will result in a smooth bend. It is recommended to leave at least a remaining thickness of 2 mm (equivalent to a cutting depth of not more than 7 mm) in order to maintain sufficient strength of the panel after sawing. The kerf cutting process is laborious, using a table saw or radial arm saw are more efficient options. Our advice is to experiment with the material in order to find the right machine settings for the preferable result. Bending the panels with kerfs on the outside is also an option but weakens the curve, over-bending the material can result in increasing it.
Download Processing manual (ENG)
Download Verwerking handleiding (NL)
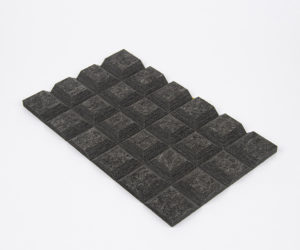
 There are many cutting patterns that can be used to increase the flexibility of the PET Felt. Incisions make the material more flexible and easy to shape. Different patterns and the scale to which they are applied have different effects on the flexibility and firmness of the PET Felt panel.
Download Processing manual (ENG)
Download Verwerking handleiding (NL)
When installing PET Felt, it is advisable to use a polymer adhesive like Bison Poly Max High Tack. This SMP sealant is available at most hardware stores.
Download Installation manual (ENG)
Download Montage handleiding (NL)
When installing PET Felt, it is advisable to use a polymer adhesive like Bison Poly Max High Tack. This SMP sealant is available at most hardware stores.
Download Installation manual | Patterned panels (ENG)
Download Montage handleiding | Patterned panels (NL)
Brad nails can be applied by using a brad nailer, an equivalent pneumatic or cordless nailer tool. Using a brad nailer is the quickest way to instal the PET Felt panels. The nails will not be apparent because they disappear between the fibres. However, if you look closely, small holes will still be visible.
Download Installation manual (ENG)
Download Montage handleiding (NL)
Brad nails can be applied by using a brad nailer, an equivalent pneumatic or cordless nailer tool. Using a brad nailer is the quickest way to instal the PET Felt panels. The nails will not be apparent because they disappear between the fibres. However, if you look closely, small holes will still be visible.
Download Installation manual | Patterned panels (ENG)
Download Montage handleiding | Patterned panels (NL)